A full detail should include, what exactly?
It is our goal to provide an eye-opening view about auto detailing as a business and a customer. Professional detail service is one of the top 3 reasons why customers seek a quote from us. The shop and customer need to clarify what is included in a full detail service because they don’t automatically agree.
Understanding this is the key you need to turn when making or accepting an offer. Not all full detail car services are the same, so it is important to understand the question, what does a full detail include, you can follow this link to our car detailing service and form your own opinion.
Three car detailing pillars
The following few sections will explore the basics that any automotive detailer must know in order to work in the professional detailing industry. Some tasks are demanding and challenging, whereas others are repetitious and predictable.
Car exterior detailing
- Car wash brush, soap & bucket
- Clay bar & spray bottle (soapy water)
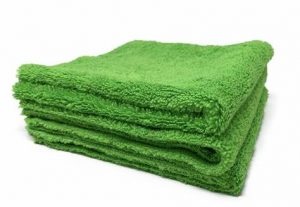
- Microfiber towels for drying
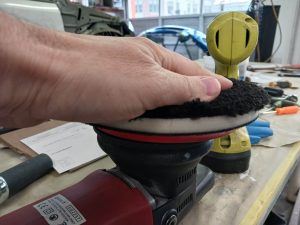
- Random orbital polishing machine
- 5-inch backing disk (with vent holes)
- 6-inch finishing pad with foam backing (high pile)
- Leather work gloves to absorb buffer vibrations
- A micro-compound for buffing
- Microfiber cloths
- Foam trim panel applicator
- Particle mask
- Stand up shop bench
- Increased lighting
Follow this link to our paint correction and pollution damage article and it will help to better understand how it all ties together.
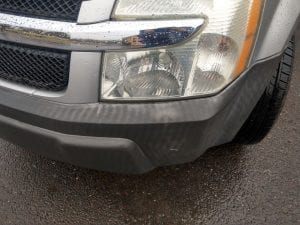
If it is going to get messy then you will want to use 1.5-inch painters’ tape along the trim & on the car. This will create a barrier up closest to the trim being restored & keep the funk off that area directly. Pass the applicator back and forth 1-2 dozen times before moving on. Apply more product as needed to keep it wet without any dripping.
Allow to set for 3-5 minutes, then use a fresh dry foam applicator and do not add any product to it. Use it to repeat the entire process on each trim molding. Wait another 3-5 minutes before using a wax applicator pad & a tire shine product. Use the wax applicator to firmly rub the tire shine product into the trim moldings a dozen wipes for trim molding.
Let it air dry and enjoy a lasting shine. This has minimal effect on sun bleached black rubber bumpers. Instead, I hear there is a trick with a propane blow torch, but it’s probably best to leave that up the professionals.
Car polishing by hand and by buffer machine
Car interior detailing
- Portable Light Wand
- Pick set (for picking at crevices)
- Spray bottle (soapy water)
- Paper towels (lint free)
- Microfiber towels
- Isopropyl rubbing alcohol (70% or higher)
- Trim panel applicator (foam)
- Wax applicator (microfiber)
- Plastic Trim Conditioner
- Leather Conditioner
- Brush (for getting into cracks)
- Shop vac
- Air compressor
- Air gun
- Tornado (carpet cleaning device)
- Detergent concentrated (used in tornado)
- Particle mask
- Work gloves (flexible)
- Wash brush (for weather mats)
- Bucket
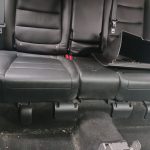
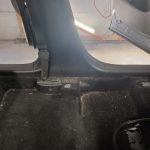
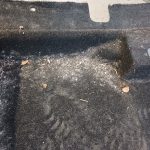
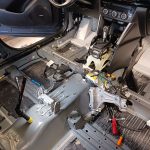
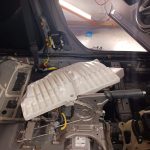
In the case of mold and mildew the seats will need to be removed along with the entire car carpet itself. Research seat removal and consult with a professional before attempting this yourself.
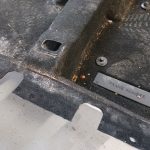
If you are removing the car seats, then inspect the seat frame and any wires hooked up to it. Check the manual for information beneath or inside the front seats & follow the instructions. Most car seats are held on by 4 bolts holding the seat frame to the floor pan. It is challenging to remove the seat perfectly so take special care and leave plenty of roof the doors to be completely opened while you work.
Use a spray bottle filled with a non-bleach product that kills mold and mildew. Test it on the carpet and wait 30 minutes to see if it causes bleaching. If it passes the bleach test then your ready to remove mold from car interior. Spray a whole bunch of your mold and mildew killing product directly on to both side of the carpet, but mainly on the top surface. Being sure the carpet is on the floor with the top surface facing up, use a whole bottle on this step. Let the carpet rest and gravity pull the soap down into the carpet for 30 minutes.
Hang the carpet in a well-lit and well-ventilated area before you begin. Wear work gloves and a respirator or high-quality particle mask while you use the Tornado carpet cleaning machine. Do not use a shop vac attachment & instead focus the blast of the machine deeply into the carpet inch by inch, until it is damp to the touch and very well cleaned out.
If you plan to use a carpet shampoo extraction machine, then this would be a perfect time to use the power of carpet extraction to remove any additional mildew or mold particles that could remain behind.
Do not forget to locate and repair the water leak that caused the problem. The usual cause is the moon roof drains being clogged. You will need experience removing and reinstalling car headliners for that diagnosis or repair to take place. Most car headliners can be removed and reinstalled in less than 5 hours.
Cloth will easily stain if it gets wet. It’s very important to save cleaning the cloth seats for last. You may need to re-wipe a few interior trim panels at the end, but that only takes a couple minutes. Cloth seats need to be done front to back all at once. The entire car seat must go through a shampoo and extraction. This means that fixing a small stain is not an option.
Cloth car seats normally need to be shampooed and extracted several times before the stains will lift. Allow 3-4 hours between extractions & in some cases wait until it’s completely dry and try again. Eventually the stain will lift. Also keep in mind that some stains just can’t be removed but keep trying until you’ve had enough.
Because there as so many different forms of leather available for car seat manufacturing, it can make it difficult to know if you are buying a good leather product for your car’s interior. Some leather car seats are slick & slippery, while others are rough & very soft.
In our opinion, most products available today spell out the type of leather it was made for. Take a look at a brand of leather conditioner that promises a shine result. I think it’s clear that our sample product has been made for slick shinny types of leather.
Only thing is clear, no rubbing alcohol and no solvents of any kind. Leathers have been cured and tanned for specific colors and feels. A solvent could bleach away the dye in that area or damage the special fibrous feel of more lush leathers.
The idea here is to be sure the interior conditioner has been firmly pressed into all the small bumps and groves. Cross wipe dozens of times trying to leave your final wipe smooth and even with no glob lines from spreading or dragging the applicator. Try and avoid touching glass or plastic shields or touch screen monitors. You can follow up later with some soapy water, but avoidance makes the follow up very tidy and easy.
- If you would like to learn more about car sealants like ceramic, then follow the link in this article.
- Follow this link to learn more about shopping for a mobile detailer.

