Professional Car Paint Correction and Swirl Removal
This progression page demonstrates our car paint correction swirl removal showing authentic before‑and‑after results of the paint correction process step by step. It shows authentic before‑and‑after results using the same panels, angles, and lighting. As a result, customers see the truth behind swirl removal and the skill required to achieve clarity.
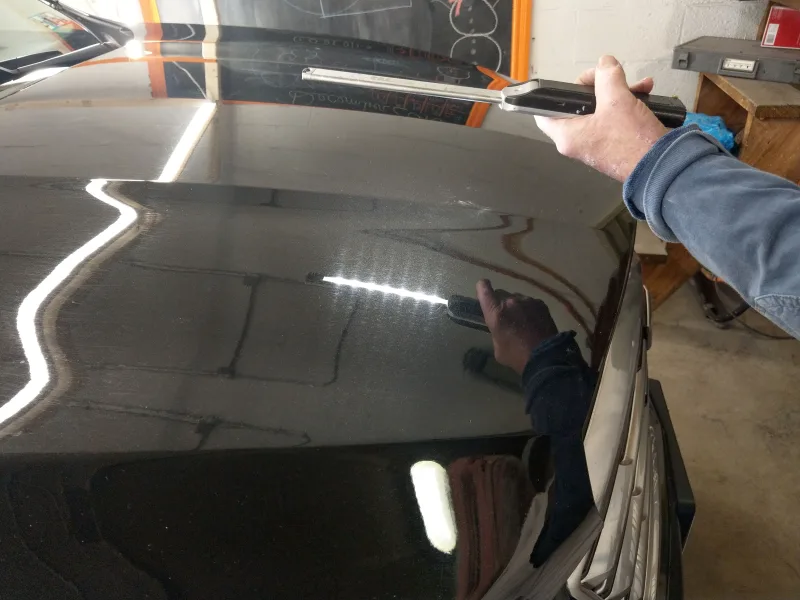
Initial hood inspection under a light wand
Before correction begins, the hood is inspected under direct lighting. This reveals the true extent of swirl marks and scratches that scatter light. In contrast, the inspection sets a clear baseline for the correction process. This baseline inspection is the first step in the car paint correction swirl removal process, showing exactly what needs to be addressed in most car detailing services.
Revealing the damage before correction
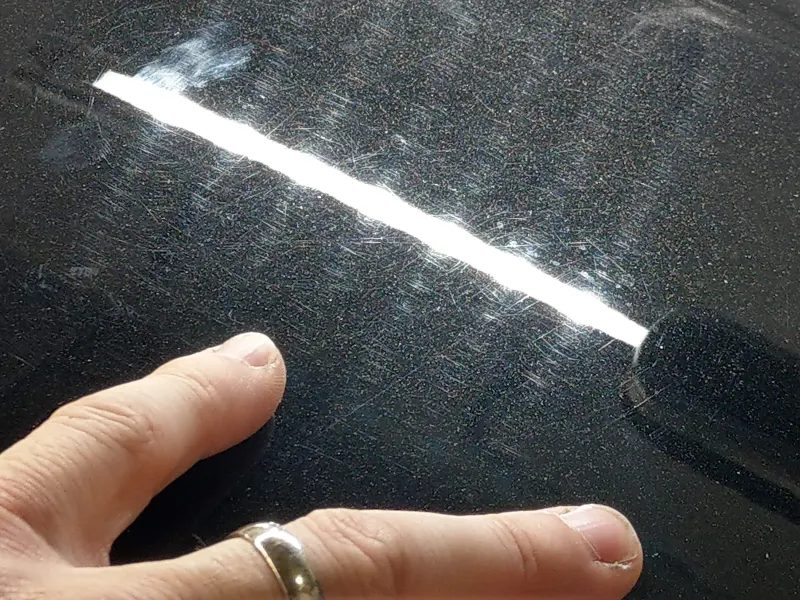
Swirl Marks and Starburst Glare on the Hood
A worker uses a light wand to expose the hood’s surface. The reflection shows starburst glares and strips of light coming off the bulbs, proving the depth of swirl damage. Meanwhile, the criss‑cross scratches highlight the need for professional paint correction that is common in most cars washed at automatic car washes.
Swirls With Starburst
Deep Etching
Car Paint Correction Swirl Removal Using the Snipper Method
After the main cutting phases, the snipper method is used for precision. This step targets scratches one by one before the final polish. Therefore, it ensures no defects remain.
Teamwork Is Best
Precision scratch‑by‑scratch correction with a fresh pad
Targeted Beveling to Remove Swirl Marks from Car Paint
Two workers coordinate: one operates the buffer while the other spots scratches visible only from his angle. Trust and teamwork are not required, but when experienced, they save time by avoiding constant repositioning.
Next, the operator tilts the pad sharply to “fang” the edge, increasing depth and beveling for targeted correction. Importantly, a fresh pad is required in this phase to maintain consistent bite. This careful beveling ensures the car paint correction swirl removal process reaches full clarity without over‑cutting.
—The hood’s clarity comes from the right technique—
see our blog Buffing vs Polishing
Hood After Car Paint Correction Swirl Removal
Once correction is complete, the hood is re‑inspected under the same conditions. This proves the authenticity of the process and highlights the transformation. As a result, the finish is swirl‑free and clear.
Authentic results with zero bait‑and‑switch
Swirl‑Free Reflection After Advanced Beveling
A short video shows the hood after swirl removal with the same light wand and angle to proof our results on this car torn up by automatic car washes. The reflection is clean: no starburst glares, no swirls, no haze.
Important note: this flawless finish was achieved not by cutting all the way down, but by mastering beveling — a skill‑based refinement that protects the paint while restoring clarity. This demonstrates the auto detailing paint correction process delivering a swirl‑free, mirror‑like finish.
—Knowledge of scratch removal comes before experience—
see how to remove scratches from paint
Swirl-Free Hood
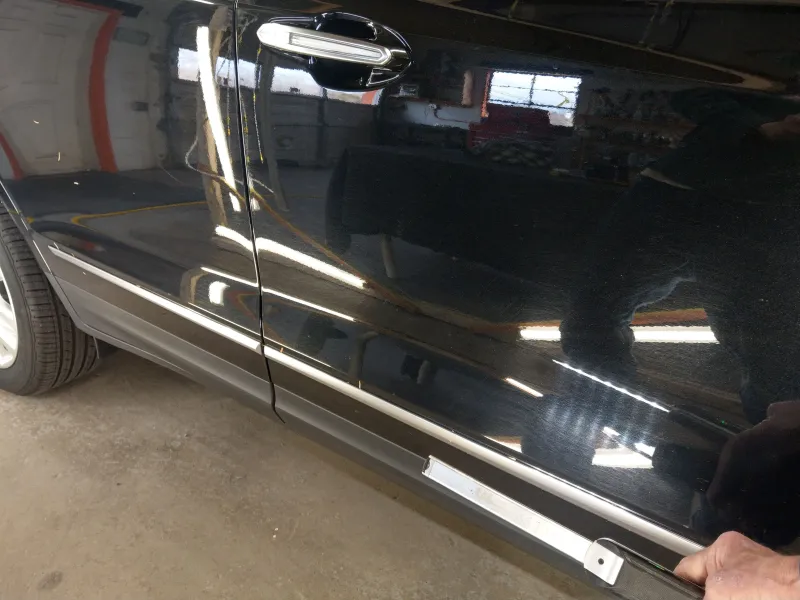
Passenger Front Door Damage Revealed
The passenger front door is inspected next, showing severe swirl damage. This section highlights how scratches distort reflections and create striping. Consequently, the need for correction is undeniable, and this panel sets up the importance of car paint correction swirl removal for restoring clarity.
Front Door Swirls
Deep Scratches
Severe swirls under inspection lighting
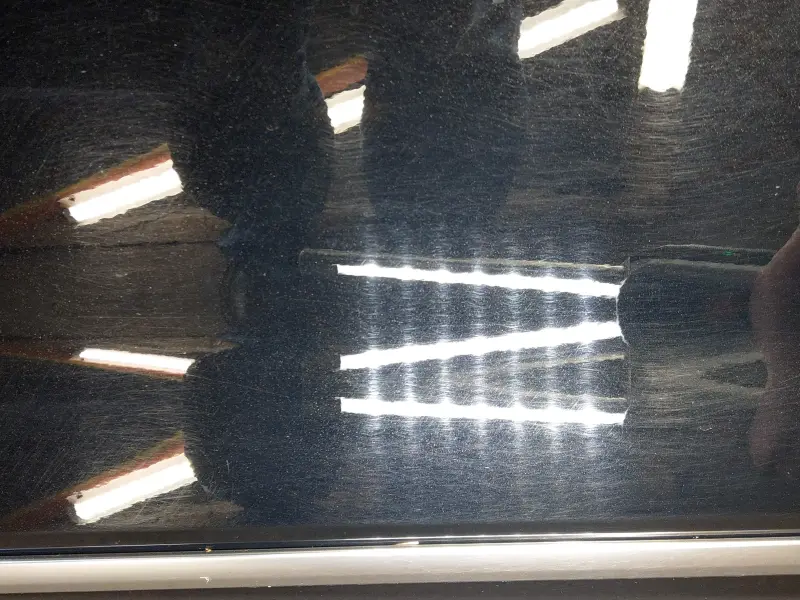
Starburst Glare and Striping on the Door Panel
Two images show the passenger front door with deep swirl damage. The light wand reflection produces strips of light radiating from the bulbs, highlighting how severe the scratches are.
Meanwhile, a close‑up emphasizes the criss‑crossing marks and uneven texture. This type of damage demonstrates why professional car paint correction swirl removal is essential to achieve a clean finish.
Passenger Front Door Damage in Motion
To reinforce the severity, the same panel is filmed in motion. This video shows how swirls scatter light across the surface. Therefore, customers see the true impact of scratches.
Driving home what swirls really are
Video Proof of Deep Scratches from Car Washes
A short video pans across the passenger door, exposing the starburst glare patterns in the reflection. Swirls like this equal scratches caused by automated car washes using the wrong brushes which is common damages we see. Therefore, professional correction is required to restore clarity and depth.
Obvious Horrible Scratches
Passenger Front Door After Correction
The same door is inspected again after correction. This direct comparison proves the effectiveness of swirl removal. Finally, the finish is restored to clarity.
Front Door Swirl-Free
Crystal Clarity
Striping eliminated, clarity professionally restored
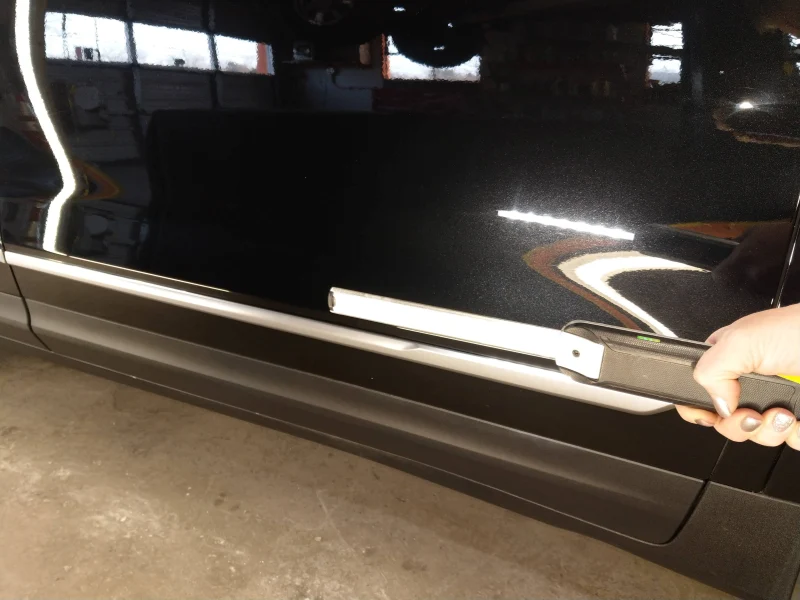
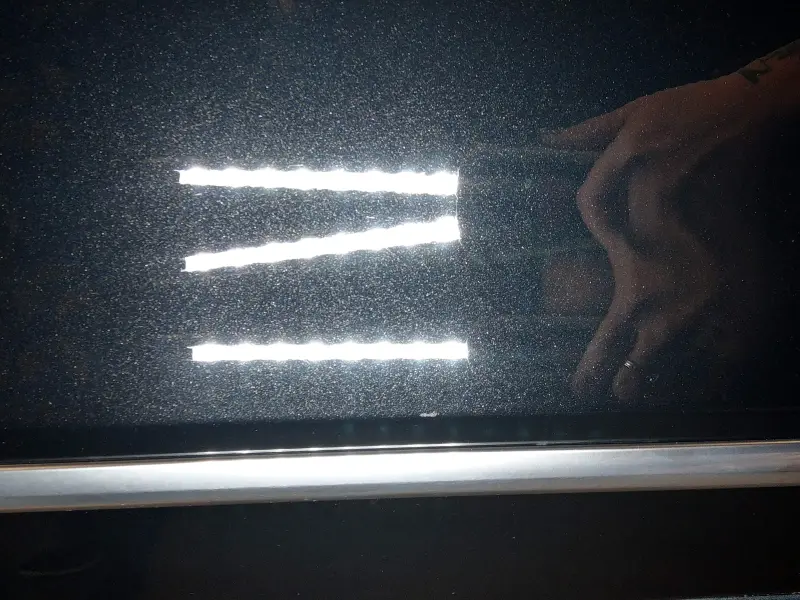
Passenger Door Results: Remove Swirl Marks from Car Paint
Two images show the same door from the same angle, now professionally corrected. The light wand reflection is clean, with no starburst, striping, or criss‑cross damage. In addition, the close‑up confirms uniform gloss and flatness. This comparison confirms the car paint correction swirl removal process restores depth and clarity to the finish.
Rear Quarter Panel Before and After Correction
The rear quarter panel is inspected with two videos. First, the damage is revealed, then the corrected finish is shown. Consequently, the difference highlights the mastery of beveling and the steps in car paint correction detailing required for swirl removal.
Mastering beveling for flawless results
From Deep Criss‑Cross Swirls to Zero Glare
The first video pans upward on the passenger‑side rear quarter panel, revealing painful criss‑cross swirls and starburst glare. The second video uses a similar angle and shows the same panel with zero starburst or swirling, just pure clarity. Crucially, this did not happen by cutting all the way down, but by mastering beveling to remove swirl marks from car paint without over‑thinning.
Want to understand why this repair method works so well?
Visit our Auto Detailing Resource Hub
Before
After
Acid Etching Exposed on Rear Door Glass
Beyond paint, glass can also suffer damage. Acid rain etching and risks from buffing laminated glass are revealed here. As a result, customers understand the challenges of glass correction.
Acid Rain Damage
Hidden drip‑line damage revealed by moisture
Acid Rain Drip Lines and Laminated Glass Risks
A short video shows a worker wiping the rear door glass with a damp cloth; as moisture settles, nested acid etching drip lines appear from acidic rain drying over time. These etchings must be buffed out, yet beveling glass is extremely difficult and risky. When buffing laminated glass, heat at the contact zone can warp the laminate and leave permanent fisheye‑like distortions — worse in hot summer months and less noticeable in winter.
—Don’t buff your glass until you know more—
Explore our guide on how to clean auto glass
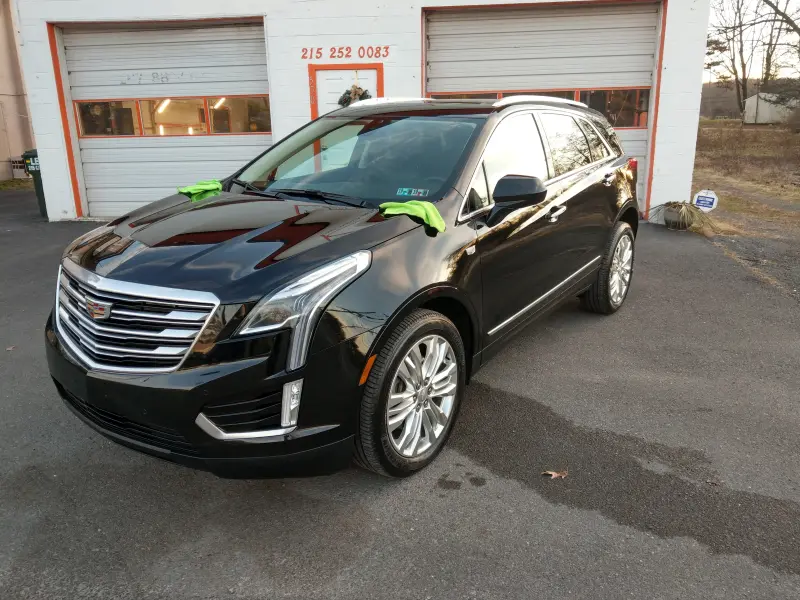
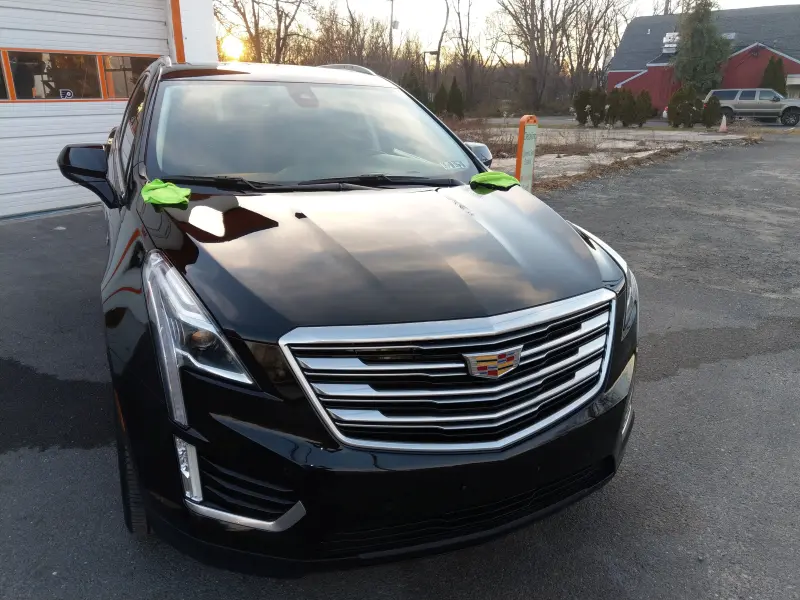
Final Car Paint Correction Swirl Removal Showcase
The progression concludes with exterior images of the fully corrected car. This final reveal proves the transformation and invites customers to act. Therefore, the page ends with a clear call to action.
See ceramic coating after paint correction our showcase — stunning gloss – final results
or return to the Media Gallery of Car Restorations
Slick, swirl‑free, and ready to impress
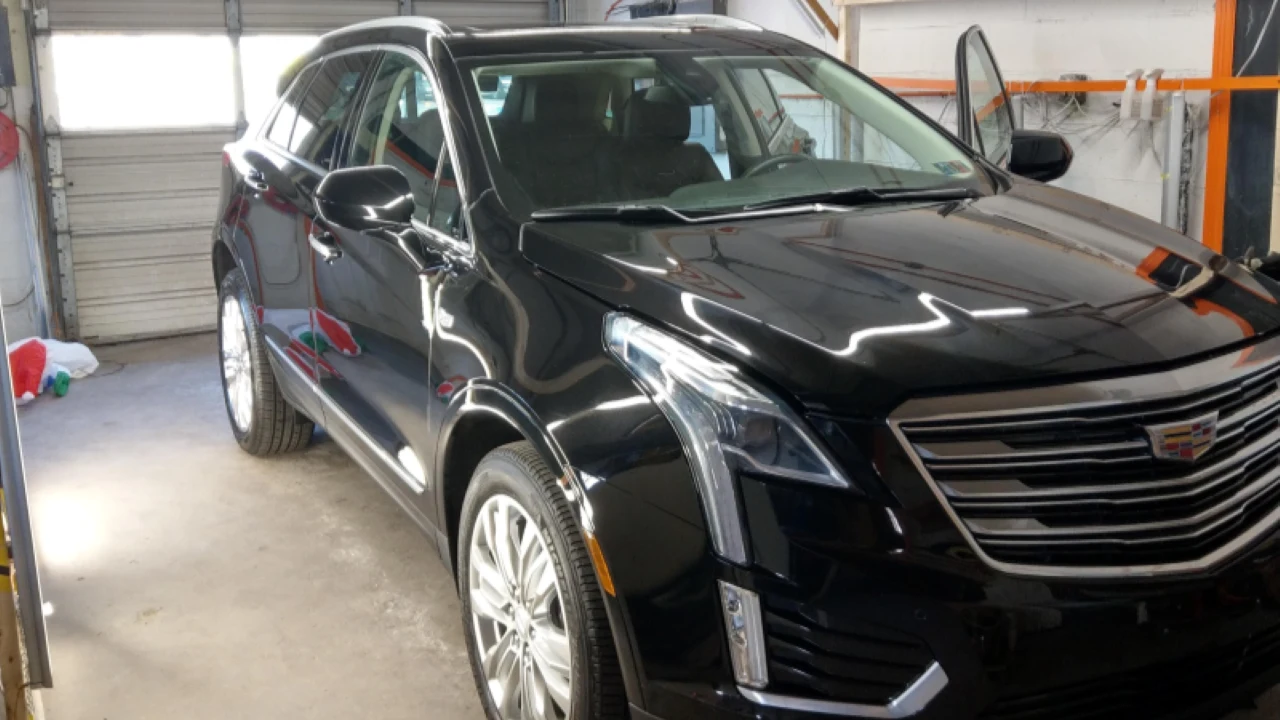
Professional Finish Revealed with Oil‑Like Gloss
The finish is so slick it looks wet confirming uniform clarity and depth. This final reveal proves the car paint correction swirl removal process delivers a slick, oil‑like gloss.
Free Estimate OnlineFlawless Finish
Crystle Clear