How to Remove Tree Sap Without Damaging Paint
Wondering how to remove tree sap without damaging paint? Tree sap isn’t just sticky—it’s chemically aggressive. If left untreated, it bonds to your clear coat, distorts reflections, and triggers micro-cracks. This safe tree sap removal technique helps protect your clear coat while lifting stubborn residue. This guide walks you through safe removal methods, inspection tips, and when to call a pro.
🔹Why Tree Sap Is a Serious Threat to Your Car’s Finish
Sap damage often starts small but escalates quickly. As it cures, it oxidizes and embeds into the clear coat, leading to ghosting, dull spots, or crazing. These defects weaken the finish and can require professional correction if not caught early.
🔸Common Signs of Sap Damage:
- Cloudy or hazy reflections
- Sticky residue that resists washing
- Fine cracks or “crazing” in the clear coat
- Ghost-like outlines after removal
🔹How to Remove Tree Sap Without Damaging Paint (Safely)
Removing tree sap isn’t just about scrubbing—it’s about protecting your paint while lifting a stubborn contaminant. Sap bonds to your clear coat like glue, and the wrong approach can cause micro-scratches, etching, or even permanent damage. Before you reach for harsh chemicals, start with the safest methods. These techniques work best on fresh or lightly cured sap—and help avoid accidental damage to your paint.
🔸Method 1: Clay Bar + Soapy Water (Safest for Light Sap)
- Warm Soapy Water – Loosens fresh sap and softens residue.
- Use a clay bar to gently lift sap without scratching.
- If the clay gets sticky, fold and knead it to expose a clean surface.
- Works best when sap is fresh or slightly warm.
This safe tree sap removal technique is ideal for fresh sap and minimizes the risk of scratching.
Internal links: → Explore our clay bar guide for safe decontamination
Pro Tip: If sap is sticky, be patient and keep swiping that clay bar over and over. Apply pressure.
🔸Method 2: Isopropyl Alcohol (91%) + Microfiber
91% Isopropyl Alcohol – Slowly Dissolves hardened sap when applied gently with a microfiber towel.
- Soak part of a microfiber towel with 91% isopropyl alcohol.
- Gently blot and wipe the sap—avoid rubbing with your finger.
- Rotate the towel to a clean section as it picks up sap.
- Rinse with soapy water afterward.
- Usually leaves fine scratches that can easily be polished out.
Pro Tip: Avoid direct sunlight and a warm paint surface to prevent paint softening.
🔸Method 3: Solvent (Advanced Users Only)
Only use solvents if you’re experienced with paint systems. Test on a hidden area first and never use on single-stage paint. If you’re unsure, skip this step and consult a professional. Never use on single-stage paint systems!
- Solvent Caution – Only use paint-safe solvents if you’ve tested on a hidden area and know your paint system.
- Test on an inconspicuous area first (e.g., lower bumper).
- Apply with a microfiber towel and gently wipe the sap.
- Expect 3–6 passes per spot; don’t overdo it.
- Avoid rubbing or direct pressure, remain gentle and let the chemical do the work.
Pro Tip: Never use Magic Eraser, acetone or nail polish remover—they’ll destroy your clear coat.
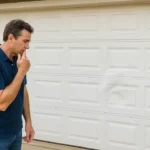
🔹Post-Cleaning Checklist: Inspect for Paint Damage
Once the sap is gone, inspect the area under proper lighting. Look for ghosting, dull patches, or surface distortion. These signs often mean the sap has etched the clear coat or triggered micro-fractures. Even with a safe tree sap removal technique, some etching may still occur if sap has cured too long.
What to Look for After Cleaning:
- Dullness that doesn’t polish out
- Ghost outlines where sap used to be
- Fine cracks or crazing
- Uneven texture or reflection


🔹Fixing Sap Damage: Wet Sanding & Polishing
Only attempt this if you’re confident in your paint correction skills. Wet sanding can restore clarity if sap has etched the surface—but it’s easy to go too far. If your paint has already been compromised, a paint-friendly sap removal method may not be enough—polishing or wet sanding may be required.
🔸Steps to follow:
- Use 3M Trizact 3000 grit sandpaper with lubrication
- Sand lightly until defect begins to fade
- Follow with compound and polish
- Finish with ceramic sealant or wax
Internal Links: → Explore our wet sanding guide for advanced paint refinement → Explore our buffing vs polishing guide to understand paint correction → Explore our scratch removal guide for finish-safe correction
If the defect doesn’t improve within a few passes, stop. Over-sanding risks burning through the clear coat.
🔹Quick Reference: How to Remove Tree Sap Without Damaging Paint
Use this checklist to learn how to remove tree sap without damaging paint—step by step. If you reach the end and still see dullness or crazing, stop and call a professional.
- ✅ Wash area with warm, soapy water
- ✅ Try clay bar first
- ✅ Use 91% isopropyl alcohol with microfiber
- ✅ Test solvent on hidden area before use
- ✅ Inspect for etching or crazing
- ✅ Wet sand only if necessary
- ✅ Finish with polish or ceramic sealant
If you’ve followed every step and the damage remains, it’s time to call a pro. Crazing, ghosting, or dullness that won’t fade usually means the clear coat has been compromised. Professional correction ensures the damage doesn’t spread—and protects your paint long-term.
Summary
Every step above is part of a safe tree sap removal technique designed to protect your paint and prevent ghosting.
Tree sap removal is a step-by-step process that requires patience, inspection, and restraint. If you’ve completed the guide and still see signs of damage, don’t push further—professional correction is the safest next move. Acting early protects your paint and saves you from costly repairs. A professional may also teach you how to remove sap without damaging the paint for the future. See how Consumer Reports recommends removing tree sap without harming your car’s paint.
Additional Internal links:
- This guide is part of our Auto Detailing Resource Hub — explore more prep and protection tips.
- Learn more about Auto Detailing on our main service page — see how the process works from start to finish.
- Have more questions? Visit our Auto Detailing FAQ for quick, clear answers.